Make Your Own Wormery
Worms aren’t fussy about the home they live in as long as it fulfils certain basic requirements:
· It must be dark
· It must be damp
· There must be adequate drainage so it doesn’t get too wet
· There must be adequate ventilation – worms need air to breathe
Choosing a container: surface area is more important than depth, ideally a wormery should only be about 18 inches deep. This is because composting worms tend to feed upwards, bedding can compact down in a deep container and push air out of the bottom layers making them anaerobic.
Worms will eat about half their body weight in food a day so 1kg of worms will eat about 3.5kg of food a week. The greater the surface area you can provide for them the better, the ideal ratio is 1kg of worms per square foot surface area.
Wood or plastic? Wooden bins “breathe” more than plastic bins but they deteriorate more quickly because the wood is always damp, they are also heavier and therefore difficult to move and they cost more to make.
It is usually possible to find an old plastic container that can be adapted for use as a worm bin.
Plastic wormery with a tap
You will need:
· A plastic container with a lid
· Sand or gravel
· Bedding material for the worms, shredded newspaper or a coir block
· A plastic tap
· Weed free membrane
· Wooden slats
· Damp newspaper
· Composting worms
What to do:
· Make sure the container has been properly cleaned out
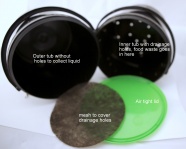
· Drill a hole for the tap in the bin, about 5 to 10 cm from the bottom and insert the tap
· Cover the inside of the tap with the weed free membrane to stop the tap becoming blocked
· Drill holes, a couple of millimetres diameter, into the lid and around the sides of the container
· Cover the holes on the inside with the weed free membrane
· Put 5 to 10 cm of sand or gravel in the bottom of the bin
· Place the wooden slats on top of the sand or gravel
· Place about 10 to 15cm 0f damp bedding material for the worms on top of the slats
· Add the worms to the bedding material
· Feed the worms small amounts of chopped up food
· Bury the food waste in the bedding
· Cover the food with damp shredded paper or damp newspaper, this helps keep flies out and provides a carbon source for the worms
· When you lift the lid if you can see worms on the surface or in amongst the food waste then the worms are ready to be fed again
· Feed the worms in a different area
· Once a week check to see if there is any liquid to drain through the tap
· Dilute the liquid 1:10 with water and use as a liquid plant feed
· When the wormery is about ¾ full leave it for about 2 weeks to give the worms time to move up into the food
· Lift out the top 6 inches of contents and set aside. This will contain partly broken down food and most of the worms
· Empty the worm casts from the container
· Put some damp paper in the bottom of the wormery and replace the contents you had set aside
· Repeat the process
Wooden wormery
· Because a wormery is a damp environment it is important to use as durable a material as possible, exterior grade ply will do but marine grade ply is even better
· The wood will need to be treated with a wood preservative such as cuprinol.
· You will be making a wooden box with a lid. When you have decided on the size you want, (1m x 1m x 0.5m deep would be big enough for a large family or a small school) give the dimensions to a timber merchant who will be happy to cut the pieces of timber to the required size.
· The wormery should not rest on the ground; raise it by using slabs of wood or bricks or by giving your wormery feet.
· Drill drainage holes in the bottom, at least 6 x 1cm diameter holes.
· Cover the holes with a porous material such as weed free membrane
· Drill at least 2 horizontal rows of holes 1cm in diameter around the sides of the wormery
· Cover the holes with a porous material such as a weed free membrane
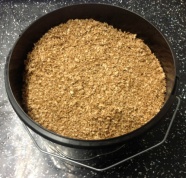
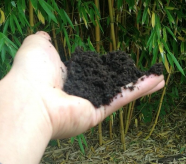
Making bedding
Worm bedding is multi functional. It provides a safe environment for the worms to live and holds water; it can also be used to bury the food waste.
The cheapest bedding is shredded paper or hand shredded newspaper. You will need at least 2 inches depth of damp shredded paper.
Alternatives are coir or horse manure.
Whatever medium you use add a handful or two of soil. This provides some grit to aid the breaking down of food waste in the worm’s gizzard. It also introduces inoculums of a variety of soil bacteria, protozoa, and fungi which will aid the vermicomposting process.
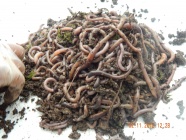
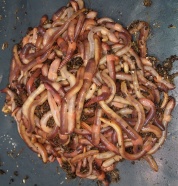
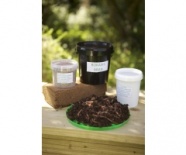
Composting worms
Worms can be bought from worm breeders or from bait shops. The commonest worms used for composting in the UK are Dendrobaena and Eisenia fetida. A lot of worm retailers only sell Dendrobaena as they are the easiest worms to breed, they are good composting worms but if possible it is better to use a mix of Dendrobaena and Eisenia as they have slightly different likes and dislikes and a combination of the two provides the best of both worms.
Before buying worms check out their provenance – it may sound silly but many retailers import their worms and they don’t always travel too well.
It is also worth checking if the worms come with a good supply of bedding or if they are being sent ‘dry’, with a coir block for you to make up your own bedding. Worms travel better if they are sent in bedding and they settle down better in the wormery.
If you have any questions please ring 01886 832559 or emailinfo@bubblehouseworms.com , we are always happy to try and help
_(1).jpg)